- None: No radiopacities
- Mild: Faint radiopacities noted during cardiac cycles
- Moderate: Dense radiopacities noted only during the cardiac cycle before contrast injection
- Severe: Dense radiopacities seen without cardiac motion before contrast injection, usually affecting both sides of the arterial lumen (tram track)
- In IVUS, a calcified plaque is defined as the presence of a hyperechoic region with acoustic shadowing.
- Coronary calcium is typically quantified by measuring its angle because IVUS cannot penetrate calcium to measure its thickness, area, or volume.
- IVUS calcium angle = < 90° (pic. 1): Mild Coronary calcium
- IVUS calcium angle = 90-180° (pic. 2): Moderate calcium
- IVUS calcium angle = > 180° (pic. 3): Severe calcium
- Our IVUSAID application, available on both app stores as well as CardiologyApps.com/IVUSAID, has many examples of calcific lesions to explore.
- Optical coherence tomography (OCT) has higher resolution than IVUS.
- OCT measures backscatter of light and detects calcium as signal-poor area with well-delineated sharp borders.
- Compared to IVUS, OCT has demonstrated higher accuracy for diagnosing calcium with almost perfect sensitivity and specificity in a histological validation study.
- In addition to calcium arc angle and length, OCT can assess its thickness, area, and volume.
- Calcium angle < 90° and thickness < 0.5mm (pic. 1): Mild calcium
- Calcium angle 90-180° and thickness < 0.5 mm (pic. 2): Moderate calcium
- Calcium angle > 180° and thickness > 0.5 mm (pic. 3): Severe calcium
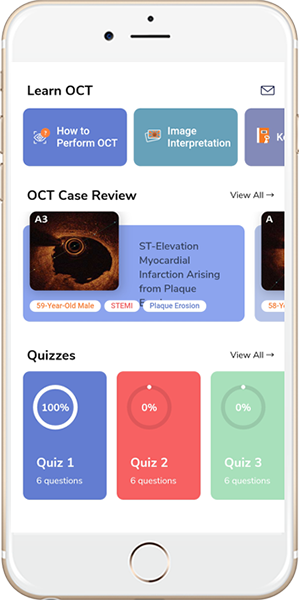
- Our OCTAID application, available on both app stores as well as CardiologyApps.com/OCTAID, has many examples of calcific lesions to explore.
OCT of ISR
Neointimal hyperplasia one year after stenting (pic. 4)
Two stent layers with neointimal hyperplasia (pic. 5)
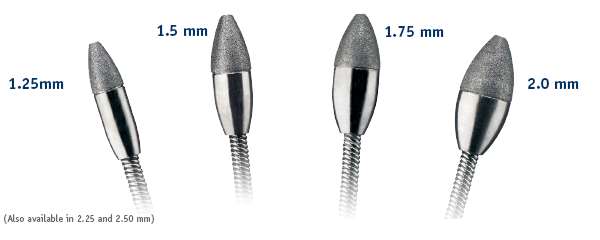
- Utilizes a high speed (160,000+ RPM) rotating diamond coated burr to ablate atherosclerotic plaque and restore luminal patency.
- Unlike orbital atherectomy, Rota burr diamonds are present in the front half of the burr; therefore the atherectomy is done with small pecking and forward motions only.
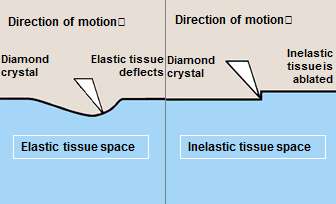
- Differential cutting
- All diseased plaque is inelastic
- High speed rotational ablation differentiates healthy elastic vessel wall from plaque
- Orthogonal displacement of friction
- Friction develops in longitudinal direction between the guide wire and the device
- High speed rotation changes the friction vector to a circumferential direction
Common uses
- Severely calcified lesion
- Undilatable/chronic lesion
- Diffuse long lesion
- Small vessels (< 2.5 mm)
- In-stent restenosis
- Bifurcation lesion
- Ostial lesion
Contraindications
- Thrombotic lesions
- Extremely tortuous lesions
Procedural steps
- Select proper burr size (0.5-0.6:1 burr to artery ratio)
- Select Proper guide size (1.25-1.75 burr = Use 6Fr, 2.0 burr = Use 7Fr, > 2.0 burr = Use 8Fr)
- NC balloon (1:1) prepped and ready
- Temporary pacemaker for RCA or dominant LCx/unprotected LM lesions
- Be gentle when removing the RotaWire from packing, wipe and make 3 large loops
- Assess if the lesion can be directly wired with RotaWire (70-80% stenotic calcified lesion)
- If cannot be directly wired ( > 90% stenosis, long lesions, tortuous lesions)
- Wire using Over-the-wire (OTW) technique using micro catheter (such as fine cross TM, Terumo, Tokyo, JP) or OTW balloon
- Once the lesion is crossed with fielder or workhorse wire, advance the microcatheter or OTW balloon pass the lesion
- Remove the wire (make sure to flush with 5cc of saline while removing the wire to prevent air entry)
- Advance the RotaWire through the microcatheter or OTW balloon past the lesion
- Slowly remove the microcatheter or OTW balloon with maintaining the wire position
- If unable to advance the microcatheter or OTW balloon past the lesion, advance up to the lesion, remove the wire and advance the RotaWire and try to directly wire the lesion
- If unable to advance the RotaWire past the lesion, remove the wire and reinsert the workhorse wire and perform atherectomy with Excimer laser
- If RotaWire crosses the lesion but the microcatheter or OTW balloon doesn’t cross the lesion, downgrade the burr to 1.25mm
- Make sure the clip is attached to the back end of the wire before you advance Rota catheter through the guide that needs to be attached through the atherectomy, only to be removed after the Rota catheter is removed from the guide.
- Perform a speed check (140K-150K RPM) before advancing the Rota catheter
- Rota flush needs to be continuously flushed throughout the procedure
- Technique:
- Slow burr advancement
- To-and-fro short pecking motions of the burr
- Shorter burr runs (15-20 secs)
- Low burr speeds (140-150K rpm)
- Strict avoidance of significant drop in rpm ( > 5K rpm for 5 sec)
- Keep SBP > 100mmHg, if needed give 100-200mcg Neosynephrine
- Advance on dynaglide mode and move forward for distal lesions
- After atherectomy is done and Rota catheter is out of the guide with dynaglide on, turn off the flush and remove the clip (Remember clip off and drip off). Make sure wire does not come out.
- Take cine to rule out complications.
- Once the atherectomy is done, try to wire side-by-side with workhorse wire.
- If unable to wire side-by-side, advance microcatheter or OTW balloon over the RotaWire and then exchange with 300cm workhouse wire, which can be used for angioplasty and stenting.
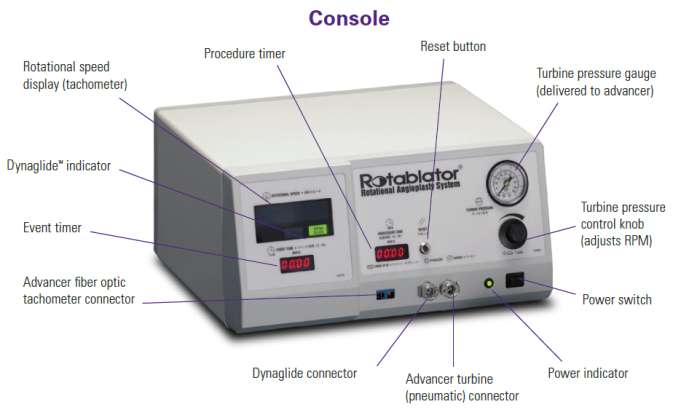
First generation device: ROTABLATOR™(Boston Scientific, Natick, MA)
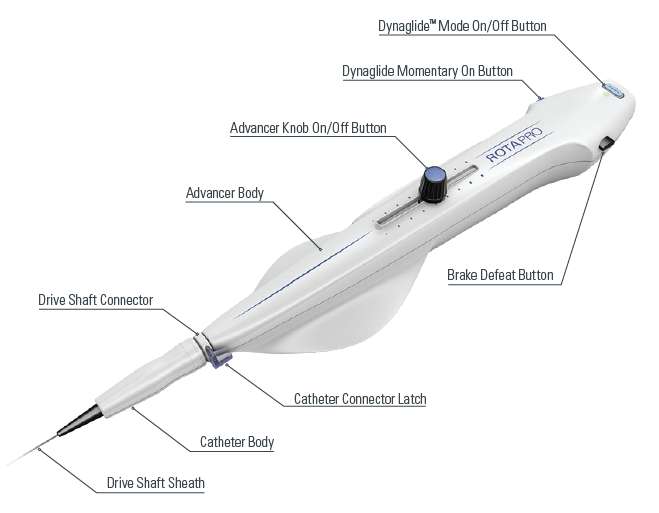
Advancer
Second generation device: ROTAPRO™(Boston Scientific, Natick, MA)
Rota flush
- Ingredients
- Rotaglide solution one vial + 5000mcg of nitroglycerin + 5mg of verapamil + 5000 units of heparin mixed in one liter normal saline bag. Avoid nitroglycerin in Aortic stenosis patients.
- ROTAGLIDE is a lipid based emulsion designed to lubricate the ROTABLATOR/ROTAPRO system.
- ROTAGLIDE
- Reduces friction and improves tactile feel
- Reduces heat build-up around the ROTABLATOR burr
- Reduces sudden drops in RPMs caused by lesion feedback
- Is contraindicated if patient is allergic to eggs or olive oil
Diamondback 360® – Coronary Orbital Atherectomy System
Principles of CSI orbital atherectomy
Uses 1.25mm eccentrically mounted diamond-coated crown
Unlike rotational atherectomy it provides bidirectional sanding
Orbital atherectomy principle of operation is centrifugal force FC = mv2 / R
(FC) Centrifugal force
- Moving the crown outward from its axis allowing it to treat lesions in different vessel diameters
(M) Mass
- The mass of the crown
- Directly proportional
- As Mass increases, centrifugal force increases
(V) Velocity
- Device rotational speed
- Directly proportional
- Exponential relationship
(R) Radius of rotation
- Inversely proportional
- As Radius increases, centrifugal force decreases
- Denovo severely calcified coronary artery lesions.
Contraindications
- The VIPERWIRE guide wire cannot pass across the coronary lesion
- The target lesion is within a bypass graft or stent
- The patient has angiographic evidence of thrombus
- The patient has angiographic evidence of significant dissection at the treatment site
Procedural steps
- Select compatible 6fr guide.
- Required guidewire: Viperwire guide wire.
- Assess if the lesion can be directly wired with Viperwire (70-80% stenotic calcified lesion).
- If lesion cannot be directly wired ( > 90% stenosis, long lesions, tortuous lesions):
- Wire using over-the-wire (OTW) technique using micro catheter (such as fine cross TM, Terumo, Tokyo, JP) or OTW balloon.
- Once the lesion is crossed with fielder or workhorse wire, advance the microcatheter or OTW balloon past the lesion.
- Remove the wire (make sure to flush with 5cc of saline while removing the wire to prevent air entry).
- Advance the Viperwire through the microcatheter or OTW balloon past the lesion.
- Slowly remove the microcatheter or OTW balloon while maintaining the wire position.
- If unable to advance the microcatheter or OTW balloon past the lesion, advance up to the lesion, remove the wire and advance the Viperwire and try to directly wire the lesion.
- If unable to advance the Viperwire past the lesion, remove the wire and reinsert the workhorse wire and perform atherectomy with Excimer laser.
- Thread the Viperwire through hemostatic valve.
- Activate device before inserting into the body. Test for free axial movement of control knob then lock at 1cm mark.
- Advance the device keeping Viperwire placement stationary to position approximately 1cm proximal to the lesion
- Lock the brake to prevent the moving of the wire during atherectomy.
- Atherectomy speed should be approximately 1mm/sec.
- Atherectomy recommended on low speed 85rpm.
- Slide the crown back and forth across the lesion and always return to the proximal side of the lesion when the set is complete.
- GlideAssist mode enables the crown to spin at a slow speed (5k RPM) for advancing to the distal lesions or removal of the device over the guide wire. To turn on the GlideAssist mode, press and hold speed control button until the green light keeps flashing. Repeat the same to turn it off.
- For every 20 seconds of atherectomy, a rest period of equal time with maximum treatment of 5 mins is recommended.
- Never force the crown if any resistance is felt within the vessel as perforation my occur.
- After treatment, unlock the guide wire brake, lock the crown advancer knob, and remove the device with proper over-the-wire technique to maintain wire position.
Components
- OA flush ingredients: 20ml ViperSlide lubricant per one liter of normal saline
| Rotational atherectomy | Orbital atherectomy |
| Aorto-ostial lesions Angulated lesions > 90 Subtotal and total calcified coronary occlusion Large vessel ( > 3.5mm) requiring 2.0 burr ISR and unexpanded stent Ostial bifurcation lesions |
Easy set up Fast learning curve In the setting of hemodynamic instability In vascular access issues Distal and multiple lesions |
Photoablation is the use of light to breakdown, vaporize, and remove matter.
Principles of operation of CVX-300 Excimer laser coronary atherectomy
Indications
- Total occlusions traversable by a guidewire
- Occluded SVGs
- Ostial lesions
- Moderately calcified stenoses
- Long lesions (> 20mm)
- Lesions which previously failed PTCA
- Intracoronary restenosis
Contraindications:
- Lesion is in an unprotected left main artery
- Severely tortuous coronary anatomy so the laser catheter cannot pass
- Guidewire cannot be passed through the lesion
- Bifurcation lesions
Procedural steps
- 6fr guide is compatible.
- Required guidewire: Any workhorse wire.
- Atherectomy can be performed with multiple wires (buddy wire) in place.
- Select appropriate catheter size (Catheter sizes: 0.9mm and 1.4mm). In coronaries mostly 0.9mm size catheters are used.
- Wire the lesion in the usual manner.
- Prime the laser machine (plug in and turn on the laser system, attach the foot paddle, prepare and calibrate the laser catheter, and adjust fluence and rate to the desired setting).
- Advance the laser catheter, over the wire in monorail fashion, to the proximal end of the lesion.
- Always start with lower catheter energy 40mJ/mm@/40-90Hz, and go up to 80mJ/mm@/40-90Hz by 20 incremental if not able to cross the lesion.
- Perform laser atherectomy at approximately 1mm/sec.
- Never force the laser catheter if any resistance is felt within the vessel as perforation my occur.
- Through the procedures make sure the normal saline flush is on.
- After the atherectomy done, remove the catheter while maintaining the wire position.
Components:
Excimer laser catheter
Excimer last machine
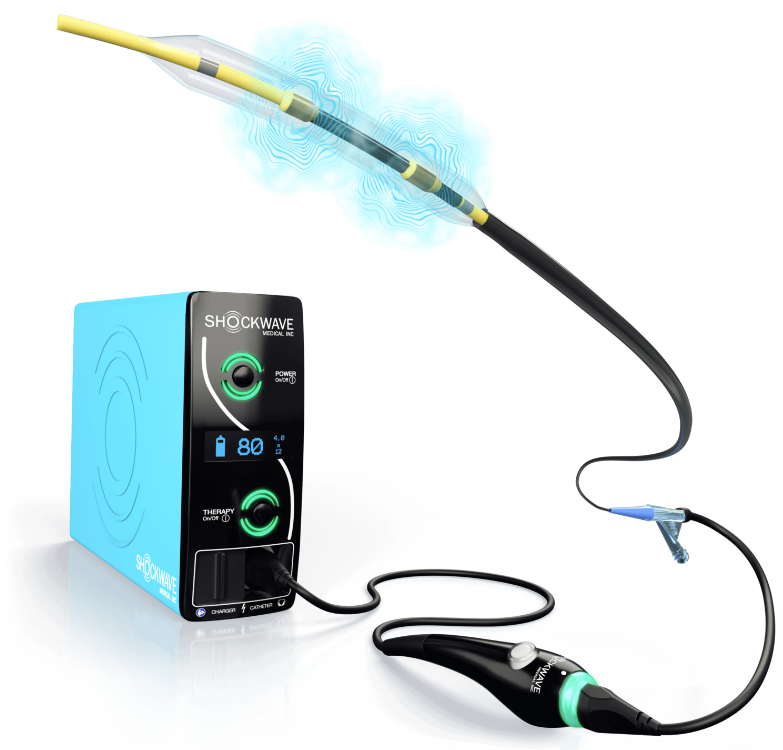
Intravascular Lithotripsy (Shockwave C2)
Introduction
Intravascular lithotripsy is a novel device to treat calcified vascular lesions. It creates acoustic pressure waves resulting in energy delivery to disrupt superficial and deep calcium deposits.
Principle
- Intermittent sonic pressure waves resulting in the delivery of mechanical energy
Common Uses
- Severely calcified lesions.
- Non-dilatable/chronic lesion.
- Large and tortuous vessels.
- Bifurcation (protected), and ostial lesions.
Contraindications
- Unable to advance a 0.014-inch guidewire across the plaque.
- In-stent restenosis remains a relative contraindication.
Components – Shockwave
- One-time disposable monorail catheter with an internally mounted ultrasound core and radiopaque lithotripsy emitters positioned around a 0.014″ guidewire. This is surrounded by a balloon.
- Connector cable connecting the catheter to the generator.
- Portable generator.
Preparing device
- Prepare balloon using standard technique; Use 1:1 saline/contrast mixture.
- Connect the catheter’s proximal end to the connector cable’s distal end. (Magnetic connection)
Procedural steps (including prep)
- Preferably 6 French systems.
- Intravascular imaging can confirm calcium extent and help in balloon sizing.
- Care should be taken not to have air bubbles in the balloon.
- 1:1 sizing of the balloon to the vessel; Balloons available in 2.5mm to 4.0mm x 12mm.
- Cross – Once the lesion is crossed, inflate to 4atm pressure.
- Press and hold deliver button – 10 pulses in sequence at a frequency of 1 pulse/s will be delivered.
- Inflate to 6atm before deflation to check for lesion yielding.
- The balloon is subsequently deflated, allowing formed bubbles to disburse safely.
- The above 4 steps shall be repeated based on the target lesion yield, length, and ensuring at least 2 treatments are delivered for each 12mm lesion length.
- Maximum pulses per C2 catheter are 80. Newer shockwave C2+ can deliver 120 pulses per catheter.
- Subsequent high-pressure balloon inflation or stent implantation and PCI optimization.
- Intravascular imaging is highly recommended in lesions needing IVL to assess the distribution and degree of calcification, help with lesion and stent sizing, as well as in checking for post-treatment results.
Hybrid approach
- Rotational atherectomy with a smaller sized burr can be used to facilitate IVL balloon crossing – “Rotatripsy” or “Rostashock”. Read more about this technique in our “Hybrid Approach” section.
This approach uses the synergistic action of an atherectomy device followed by IVL to achieve greater calcium modification.
It is preferred in:
- Balloon uncrossable severely calcified lesions, where a pilot channel can be created with atherectomy.
- A large enough vessel that can facilitate an IVL balloon after atherectomy.
- In ISR – Abluminal calcium behind the stent struts is more effectively treated with Lithotripsy rather than luminal atherectomy devices.
Pros:
- Smaller arteriotomy and sheath size can decrease vascular complications.
- Synergism between the devices focuses on different layers of calcium.
- Avoids the step burr approach; instead, perform atherectomy with a smaller 1.25/1.5 Rota burr or OA with 80K rpm followed by IVL.
Cons:
- The cost of using two different devices is a limiting factor.
1. Compliant/Semi compliant balloons
- Pre-dilatation
- Recrossing through the stent struts
- Very tight lesions
- Side branch access
- Tortuous anatomy
2. Non-compliant balloons
- Pre and post dilatation
- Resistant lesions
- Calcified lesion
- Undilatable lesions
- Aorto-ostial lesions
- If unable to cross with NC balloon, use a smaller complaint balloon for pre-dilatation.
| Vendor | Compliant/semi compliant | Non-compliant |
| Abbott Vascular | Trek (2.25-5.0mm) Mini Trek (1.20, 1.5 and 2.0mm) |
NC Trek (1.5-5.0mm) |
| Boston Scientific | Emerge Flex (1.2-4.0mm) Emerge Push (1.2 and 1.5mm) |
NC Emerge (2.0-6.0mm) NC Quantum Apex (2.0-5.0mm) |
| Medtronic | Euphora (1.5-4.0mm) Sprinter Legend (1.25-4.0mm) |
NC Euphora (2.0-5.0mm) NC Sprinter (2.0-5.0mm) |
| OrbusNeich distributed by CSI | Sapphire (1.25-4.0mm) Sapphire II (1.0-4.0mm) Sapphire II Pro (1.75-4.0mm) |
Sapphire NC (1.25-4.0mm) |
3. Super-high pressure PTCA balloon (OPN NC®; SIS Medical AG, Winterthur, Switzerland).
Specifications:
- Twin-layer balloon construction with virtually zero dog-boning effect
- Super high-pressure PTCA balloon (RBP 35atm)
- Crossing profile (0.028’’ 2.0mm), which is better than scoring- and cutting balloons
- Minimum Guiding Catheter 6 French
- Available diameters: 1.5-4.5mm diameter; Two markers for all sizes:
Indications for super high pressure dilations:
- Highly calcified lesions
- Un-dilatable lesions
- In combination with rotablation
- CTO – chronic total occlusions
- In-stent restenosis due to under expansion
* Early data report lower rates of dissections and No reported perforations
1. Cutting balloon angioplasty with Wolverine (Boston Scientific, Natick, MA)
- Cutting balloon: severs the elastic and fibrotic continuity of the vessel and cuts the continuity of the atheromatous plaque
- Indications: small vessels, bifurcation/ostial bifurcations/fibrotic lesions/mild to moderate calcified lesions/ in stent restenosis lesions
- Available diameters: 2mm-4mm (0.25mm increments)
- Lengths: 6mm, 10mm and 15mm lengths
- Nominal = 6atm, RBP = 12atm
- Avoid in thrombotic lesions in coronary spasms
- Choose 0.25 to 0.5mm less than treated vessel diameter
- After initial inflation, retract into guide and change the angle before re-advancing and doing another inflation
- If cutting balloon doesn’t pass through the lesion, do angioplasty with smaller size compliant balloon and then do cutting balloon angioplasty.
3. Cutting balloon angioplasty with Flextome (Boston Scientific, Natick, MA)
Atherotome comparison between Wolverine and Flextome
1. Scorning balloon angioplasty with Angiosculpt (AngioScore, Inc, Fremont, CA)
- Electropolished, helical scoring element safely scores lesion circumferentially.
- Rectangular edges provide a predictable dilatation resulting in low dissection rates and minimal device slippage.
- Nitinol-enhanced balloon deflation for excellent rewrap and recross capabilities.
- Large working range (2–20atm) allows device to be tailored to vessel size (Choose 0.5mm smaller size the treated vessel diameter).
- Nominal = 8atm, RBP = 16-20atm
- Available Diameters: 2-3.5mm (0.5mm increments)
- Lengths: 6mm, 10mm and 15mm
- Choose 1:1 balloon diameter
- Pre-dilatation with AngioSculpt yielded 33% – 50% greater luminal gain than direct stenting or pre-dilatation with a conventional angioplasty balloon.
4. Constrained Semi-compliant balloon angioplasty with Chocolate (TriReme Medical, Pleasanton, CA)
- The Chocolate PTA balloon is a semi-compliant balloon that is encased in a nitinol-constraining structure, or cage, that allows for 1:1 vessel sizing
- INFLATION: During inflation, the cage causes the balloon to form a series of segmented pillows and grooves along the entire lesion.
- BALLOON: Balloon is confined to the cage during inflation, preventing dog-boning and protecting healthy tissue.
- CAGE: Nitinol cage expands with balloon, protecting the vessel from torsional stresses and minimizing dissections.
- PILLOWS: The pillows apply force to create small dissections that are necessary for effective dilatation.
- GROOVES: The grooves relieve the stress and stop dissections from propagating.
If you do not have availability of the atherotomy balloons, you may consider double wiring the lesion with any work horse wire, and do angioplasty with NC balloon with second wire across the lesion. The second work horse wire may work as similar to atherotome of cutting balloon and may help cut the lesion (Poor man’s Atherotomy balloon)
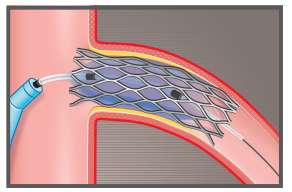
FLASH™ Ostial System is designed to stabilize, post-dilate, and conform the stent to the ostium during ostial post-stent dilation and angioplasty.
The proprietary dual balloon design enables the physician to achieve maximal stent wall apposition after post-dilation and result in treating ostial lesions.
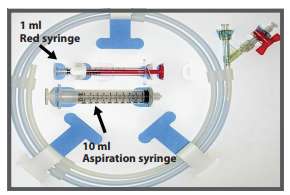
Proximal Balloon: Prep and purge using an indeflator or 10ml Aspiration syringe, then attach the 1ml syringe (red), filled with the required amount of diluted contrast. Distal Balloon: Use am indeflator to prep, same as regular angioplasty baloon.
Mid-marker: At the Ostium (placed 2mm distal to the proximal edge of the stent). Distal marker: At least 2-3mm within the stent, never beyond the distal edge of the stent. Proximal marker: In the Aorta, outside the guide catheter.
Inflate the distal balloon with an indeflator to the desired pressure. (The distal balloon requires high pressure and is specially designed for post stent dilation).
Before inflation of the proximal balloon, make sure the distal marker has not moved and is inside the stent; then use diluted conrast, inflate the distal balloon using the red 1ml inflation syringe. Inflate volume: Flash™ = 1ml. Flash™ mini = 0.4ml
Deflate the distal balloon with the indeflator and the proximal balloon with the 10ml aspiration syringe, and then withdraw the Flash Ostial system.
Introduction
- Nodular calcification is the least common form of calcification in the coronary vasculature, and it is an intraluminal protrusion. It is hard to distinguish it by luminal angiography alone; hence generally defined by OCT as a protruding mass with an irregular surface, high backscattering, and signal attenuation.
- Calcified Nodules are pathologically defined as fibrous cap disruption over a calcified plaque characterized by protruding calcification and attached thrombus. In addition, usually marked by substantive calcium proximal and/or distal to the lesion.
Etiology
- DM and CKD are highly prevalent in patients with Nodular calcification and are possible drivers of the pathology.
Epidemiology/Pathophysiology
- Imaging Studies like IVUS and OCT demonstrate that the incidence of Calcific nodules in ACS is 2.5% – 8%.
- Lesions mainly develop in the proximal to mid-portions of highly tortuous right coronary arteries, where the range of hinge motion of the coronary artery is maximal.
- Eruptive calcific nodules have a potential mechanism that leads to acute coronary syndrome.
Evaluation
- Compared with OCT, intravascular ultrasound (IVUS) cannot evaluate the thickness of calcium.
- IVUS is better suited for CKD and CTO patients, and both scenarios are associated with heavy calcification.
Challenges
- Delivery of equipment is hindered due to nodular calcification due to eccentric protrusion into the lumen.
- Lesion preparation in this type of calcific lesion is more challenging that other modalities of concentric calcium or calcific plaque.
Management
- Calcific nodules can be treated using IVL to break abluminal calcium by creating microfractures and/or an existing atherectomy device to shave the protruding nodule to achieve adequate calcium modification before stent placement.
- It is recommended to use intracoronary imaging before stent placement to check if the residual lesion needs further modification.
- Atherectomy may also be required in cases of ACS with a Calcific Nodule.
Nodular Calcification
Calcific Nodule
Guide catheter for Rotational atherectomy
| Burr (mm) | Recommended Guide Catheter |
| 1.25 | 6F |
| 1.50 | 6F |
| 1.75 | 6F |
| 2.0 | 7F |
| 2.15 | 8F |
| 2.25 | 9F |
Guide Extensions
Guide Extensions increase guide backup support and are crucial in complex PCI procedures, particularly in severe calcification and tortuosity cases.
Compatibility of atherectomy devices and guide extension catheters
| Rotational atherectomy | Orbital atherectomy | IVL balloon | Laser | |
| 5F | X | X | X | X |
| 5.5F | X | X | X | X |
| 6F | X | Yes | Yes, up to 3.5mm IVL balloon* | Yes |
| 7F | Can accommodate 1.25 burr or 1.5 burr | 4.0 IVL balloon | ||
| 8F | Can accommodate 1.75 burr |
*4.0 IVL balloon may fit in 6F guide extension, but post deflation may interact with guide extension.
- Medina classification is the simplest and most commonly used system.
- This classification indicates the location of significant stenosis (≥ 50%) in the bifurcation.
- This system classifies lesions into seven categories using a 3 component binary key based on visual assessment of lesion severity employing a ≥ 50% stenosis threshold.
- Stenoses ≥ 50% is assigned a 1 for each of the three arterial segments of the bifurcation in the following order, proximal main vessel (pMV), distal main vessel (dMV), and side branch (SB).
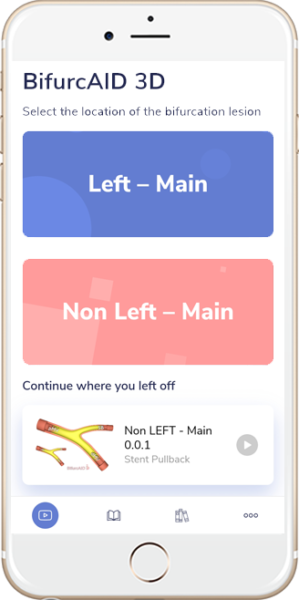
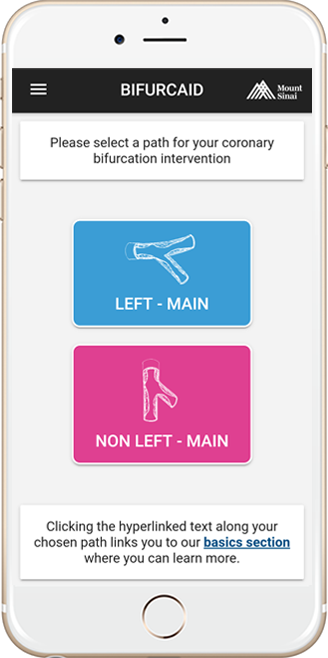
- Search the app stores for BifurcAID and BifurcAID 3D, our 2D and 3D applications on techniques of bifurcation lesion stenting.
7F system:
- Two stent strategy with mini crush
- Two stent strategy with SKS technique
- Two stent strategy with V stent technique
- Left Main PCI
- IF SB diameter is > 2.5mm, consider 7Fr system upfront for Non-LM
6F system:
- Provisional stent strategy
- Two stent strategy with DK crush
- Two stent strategy with Culotte technique
- Two stent strategy with internal crush
- Access precludes large bore sheath size
- Main Vessel: Work horse wires like BMW wires, Runthrough, ASAHI Scion, and ASAHI Prowater.
- Side Branch: Polymer coated (can be jailed; easy to re-cross) like Fielder Wire, Hi Torque or Whisper.
- Wire the most difficult branch first.
- Shaping guidewire: Shaping the wire tip either with a rounded J-shape or with a sharp angle may be sufficient to start a procedure. However, in many cases the tip curve needs to be adapted more properly to the given anatomy. Considering the variety of anatomical settings, our best recommendation is to adapt the length and angulation of the tip curve to the given anatomy. This may require long, sharp, or even multiple angulations in the tip.
- According to the bifurcation angle, guidewires can be usually shaped in 3 ways:
- First curve is to get into a SB angled 45-90° from MV (e.g. from LMCA to LAD)
- Second curve is to get into a SB angled < 45° from MV (e.g. from LMCA to RI)
- Third curve is to get into a SB angled > 90° from MV (e.g. from LMCA to LCX)
- New generation DES is recommended
Stent Size Dilemma:
- If MV stent chosen according to proximal vessel (pMV) size: there is risk of distal dissection and carinal shift occluding SB.
- If MV stent chosen according to distal vessel (dMV) size: there is risk of stent malapposition at pMV site leading to stent thrombosis and difficult guide wire exchange.
- However, choosing stent size according to dMV vessel and its expansion proximally to proximal vessel size using proximal optimization technique (POT) is the best strategy. A stent with such struts should be chosen which would allow its expansion to pMV vessel size.
- E.g. 1. Proximal Vessel 3.5mm in diameter and distal vessel 2.5mm in diameter – consider 2.75mm stent, deploy it at 10-12atm and POT the proximal vessel with 3.5mm short balloon at 16-18atm.
- E.g. 2. Proximal vessel 3.5mm in diameter and distal vessel 3mm in diameter – consider a 3mm stent, deploy it at 10-12atm and POT the proximal vessel with 3.5mm short balloon at 16-18atm.
- SB should be rewired prior to performing kissing balloon inflation or POT.
High Pressure Balloon PTCA:
- For predilation of MV or SB: Use a non-compliant (NC) balloon size typically 1:1 of vessel size.
- If unable to cross with NC balloon, change to smaller diameter compliant balloon (e.g. 2.0/12mm balloon) followed by NC balloon 1:1 size.
Atherotomy:
- Consider atherotomy in MV or SB if suboptimal results with NC / compliant balloon.
- If SB has > 70% stenosis and atherotomy balloon is available, consider atherotomy as first line treatment.
- Size of atherotomy balloon should be 0.25 to 0.5mm smaller than vessel size.
- If initial attempt of atherotomy resulted in suboptimal lesion predilation, then upgrade the size of atherotomy balloon to 1:1 size.
- Stent Delivery System (SDS): Consists of a balloon catheter on which the balloon expandable stent is mounted.
- Provisional stenting is treating the MV with a stent with or without PTCA of the SB.
- If SB < 2.5 mm, SB wiring is optional. If SB > 2.5mm, SB wiring is recommended.
- Considered when SB < 2.5mm with short length of side branch lesion < 10mm, and issues with medication compliance.
- If there is SB compromise after provisional stenting if SB < 2.5 mm simple recrossing and KBI is enough. If SB > 2.5mm, then consider bailout SB stent techniques.
- Proximal optimization technique (POT) is post dilatation of the proximal portion of the stent in the main vessel. The post dilatation is done with NC balloon diameter 1:1 in size or 0.5mm more than that of the MV stent. This makes the proximal portion of the MV stent more opposed to the vessel which has larger diameter than the distal portion. The balloon for proximal optimization is kept in such a way that the distal marker is at the level of the bifurcation (by using a short balloon). POT can be considered prior to KBI to facilitate stent expansion in the proximal vessel.
- The technique leads to:
- Strut expansion and well opposed stent
- Reconstruction of bifurcation anatomy
- Stent strut apposition to the vessel which facilitates rewiring the SB
Left Main Bifurcation
- NC balloons should be used in MV and SB being 1:1 in size
Non Left Main Bifurcation
- NC balloons of 1:1 size should be used in the MV and SB being 0.5mm smaller
These steps are common to both left main and non left main bifurcations
- If SB is difficult to recross, can use a smaller size and shorter compliant balloon.
- Stent diameter optimization for distal diameter.
- Sequential inflations performed at 16–18atm by inflating SB balloon first followed by MV balloon at the same atmosphere and then performing simultaneous inflations to the same atmospheres.
- During inflation, if the balloon slips, consider sequential inflations with low pressures at 8–10atm first in the SB and high pressures in the MV.
- Simultaneous deflation.
- Advantage of kissing balloon inflation is to reduce side branch thrombosis.
- If POT is done in the pMV, always perform final KBI if the POT balloon is overlapping the bifurcation.
Side Branch Bailout Stent Technique
Indications:
- SB flow impairment (TIMI flow < 3), SB dissection type b2/c, with or without chest pain, with or without EKG changes, SB stenosis (a) LM > 50% and (b) non LM > 70% and if it is large enough to cause significant residual ischemia.
- Future access SB may be important, e.g. during Left Main bifurcation to gain access into the circumflex branch or during non-left main bifurcation when the side branch is a large caliber vessel.
Techniques
- TAP (T-stenting And small Protrusion): After recrossing, the SB stent is placed with small protrusion (1-2mm) into MV while keeping uninflated balloon in MV stent (1:1). Then, the SB stent is deployed followed by pulling the SBS balloon slightly into MV and kissing with MV balloon is done. It provides coverage of SB ostium and creates short neo-carina. It is used when SB diameter is smaller than MV diameter and the bifurcation angle is > 70°.
- Internal Crush/Reverse Crush: After recrossing, the SB stent is retracted about 2-3mm into the MV stent while keeping uninflated balloon in MV stent (1:1 NC). Then SB stent is deployed. And then SB stent is then crushed in the MV using the balloon that was already present. The SB is then recrossed and final KBI is performed. It is used for large SB and bifurcation angles < 70°.
- Provisional Culotte: After recrossing, the SB stent is retracted into MV stent up to proximal edge and deployed. Then the MV is recrossed and final KBI is done. There will be 2 layers of stent in the MV proximal to bifurcation. It is used for large MV and SB when there is not a significant discrepancy between SB and pMV vessel diameter.
Main Vessel Bailout Stent Technique
- Indications: During non-aorto ostial stenting in (in Medina 0-0-1 lesion), if there is a compromise of MV which included flow impairment (TIMI flow < 3), SB dissection type b2/c, with or without chest pain, with or without EKG changes, stenosis > 70%, then stent the MV as a bailout technique.
Technique
- Internal Crush and Main Vessel Stenting: If there is a compromise of MV after SB stenting this technique is used. The side branch stent ostium is crushed with already placed MV balloon (internal crush). Then KBI performed. The SB balloon is removed. Then MV stent is advanced and placed to cover the SB ostium. Then the SB wire is removed and MV stent deployed. Then SB is recrossed and final KBI is done.
- Stent Pull Back Technique: Stent advanced into the SB. Deflated balloon is placed in MV covering the ostium of SB. Stent positioned in the SB to cover the ostium and deflated balloon in main vessel. Then MV balloon is inflated. Then SB stent is pulled back until it makes a dent in main vessel balloon, followed by stent deployment. This technique covers the ostium of SB without much protrusion of the stent into main vessel. It is used in non-aorto ostial lesions.
- SB diameter > 2.75mm with > 50% stenosis in case of LM bifurcation and SB diameter > 2.5mm with > 70% in case of non-LM bifurcation extending > 10mm beyond SB ostium.
- Techniques: Mini crush , Double kissing (DK) crush, Culotte and T stenting.
- SKS and V stenting is not preferred except in case of LM bifurcation which can accommodate double barrel in proximal LMCA.
Two Stent Techniques
- Mini Crush Technique: Two stents are placed in the MV and the SB, the former more proximally than the latter. The stent of the SB is placed such that about 1mm extends into the MV and then deployed. Then, SB stent balloon and wire removed. The stent subsequently deployed in the MV crushes the protruding cells of the SB stent, hence the term “crushing” or “crush”. This is followed by recrossing of the SB and final KBI. Chance of missing SB ostium is smaller in this technique.
- DK Crush Technique: SB stent positioned such way that it extends 1-2mm into the MV. 1:1 NC balloon is placed in the MV. The SB stent is deployed. Then SBS balloon and wire are removed. Then the SB stent is crushed with MV balloon. Then the SB is recrossed and KBI is done (first kiss). Then the SB wire and balloon are removed. Then the MV stent is deployed followed by recrossing of the SB and second and final KBI is done (second kiss), hence it’s called double kissing crush technique. Chance of missing SB ostium is smaller and recrossing wire is better.
- Classic Culotte Technique: The SB stent is positioned extending into the pMV. Then the SB stent is deployed jailing the MV. Then the MV recrossed and dilated with NC balloon to facilitate MV stent delivery. Then the MV stent is placed with proximal overlapping with SB stent. Then the MV stent is deployed. Followed by recrossing of the the SB and final KBI is done. This leaves proximal portion of the MV with two layers of stent. It is used for equally sized SB and MV (ex: LMCA bifurcation), with < 70° degree bifurcation angle.
- T Technique: The classic “T” technique involves positioning a stent at the ostium of the SB, and being careful to avoid protrusion of the stent into the MV. Then SB stent is deployed. Then SBS balloon and wire are removed. Then MV stent is advanced into MV and deployed. This is followed by final KBI. This technique used in almost perpendicular bifurcation angle > 70%. This technique has a high chance of missing the SB ostium.
- V Stenting: The “V” technique involves the delivery and implantation of 2 stents together. One stent is advanced into the SB, the other into the MV, and the 2 stents touch each other forming a proximal carina of < 2mm.
- Simultaneous Kissing Stenting (SKS): When the carina during V stent technique extends to a considerable length (usually > 2mm) into the MV then the technique is denoted as SKS.
- Using hydrophilic wire (e.g. Fielder, Whisper, and Sion)
- Reverse wiring technique (exchange MV wire to the SB)
- Pullback technique: entering the SB by pulling back the angulated wire already inserted in the MV facing the SB
- Plaque modification at carina with PTCA of MV, then try to enter SB
- Deflectable tip catheters (e.g. super cross)
- Use hydrophilic wire.
- POT at higher pressure or with a bigger NC balloon.
- During SB rewiring, the same wire that was used initially to wire the SB is pulled back into the guide prior to MV stenting and the same wire is used to recross. A new wire can be used if unable to recross.
- Form a loop in the MV stent and pass distal to SB to confirm the wire is in intraluminal and then recross the SB, or put the wire in the MV distal to SB and load balloon over the wire advance across the SB to confirm intra luminal and then pull back the balloon proximally and recross the SB.
- Wire Swap: The wire from the MV can be pulled back and can be used to wire the SB and SB wire (if jailed) is removed from the SB and advanced into the MV.
- Use lowest profile balloon (1.0 sapphire, 1.20 or 1.25mm, and 6-8mm in length)
- Rewire SB and access SB through a different stent strut
- Accessing SB through a different stent strut
- POT to open struts of MV into SB
- Use of micro catheter like Corsair (be careful as it can cause of damage to MV stent strut)
- Distal Edge Dissection: Management includes prolonged balloon inflation at 8-10atm for 3 minutes with a 1:1 balloon size. If dissection persists after prolonged balloon inflation, then a stent should be deployed.
- Main Vessel Dissection: If after ballooning in the healthy segment of the MV there is a dissection either proximally or distally, then the MV needs to be stented.
- Jailed SB Wire: After MV stent implantation, the wire remains trapped between the MV wall and the metallic structure of the stent. Difficulties in the removal of these wires can occur, and although extremely infrequent, the complete fracture of the wire structure can occur. Factors determining are calcification of the vessel wall, the length of the trapped wire, and a high pressure used at the MV stent deployment have been suggested as predictors of jailed wire rupture. The type of wire used is another important factor that can influence decisions made by the operator.
Steps to remove trapped SB wire:
- Pull the guide back from LMCA or Proximal RCA. Then apply gentle firm pressure on the SB wire (The guide will invariably be sucked into LMCA or Proximal RCA).
- Use a deflated or new 1.5/2.0 x 12mm balloon on the SB wire; advance the balloon on the SB wire stopping short of the proximal edge of the stent. Then pull the jailed SB wire and the balloon by exerting gentle firm pressure (be aware of the guide being sucked into the LMCA or Proximal RCA).
- For pre-procedure assessment of lesion severity and characteristics especially in left main lesions.
- For pre-procedure assessment of lesion severity of the ostial left circumflex in cases where the ostium appears hazy or cannot be visualized well on angiography. If there is significant disease in ostial circumflex then consider doing an upfront 2 stent technique.
- Post-PCI for optimization of results especially in left main stenting to make sure stent is well expanded and well opposed.
We have created a very in-depth WebApp for identifying, managing, and avoiding complication of PCI. www.CardiologyApps.com/ComplicAID has a basics section detailing the various complications as well as at least 55 in-depth cases including dissections, perforations, abrupt closure and more.
Interventional Hurdles in Treating Calcified Coronary Lesions Include:
- Underrepresentation of the degree of coronary calcification
- Poor response to balloon angioplasty
- Difficulties completely dilating the vessel
- Propensity to dissection during PTCA or pre-dilatation
- Obstruction of stent delivery to the desired location
- Prevention of adequate stent expansion resulting in stent thrombosis or restenosis
- Increased risk of stent malapposition
- Uneven drug distribution associated with restenosis
Potential Complications
- Slow flow/No flow
- Slow flow/no flow is defined by acute decreases in flow or impairment in contrast dye clearance from microvascular embolization of atherosclerotic debris and associated thrombi, platelet activation, and release of vasoactive mediators. Preventable, operator-dependent complication down from as high as 15% to 0-2.6% in the age of RotaPro; and only about 2.7%¹ slow flow, no reflow, or abrupt closure in the ORBIT II trial for OA².
- Dissection
- Dissections range in severity from Type A where a minor radiolucency is seen in the lumen without dye persistence to type F where the separated vessel wall flap has caused a total occlusion.
- Vessel perforation
- More severe than dissection, perforations extend through the entire thickness of the arterial wall.
- Lesion-specific predictors of perforation include eccentricity, tortuosity, length > 10 mm, and location in the right coronary artery.
- In case of RA: Technical modifications to prevent perforation include the use of a small burr to artery ratio (0.4-0.6), use of Rota extra support wire, pre-dilatation with a small balloon, and avoiding GP IIB/IIA before rotablation.
- Acute Closure
- Most acute closure cases are secondary to mechanical obstruction from a dissection tissue flap, and the resulting slow flow may cause activation of platelets and formation of a thrombus but can also be caused by acute thrombus formation, distal embolization of plaque and/or thrombus, and coronary spasms.
- Burr entrapment
- Applicable more to RA than OA due to the distal-facing diamond chips with a prevalence of about 0.5 to 1.0%, this complication is mostly preventable using a careful, conservative technique.
Management of Slow flow/No flow
- Administer intracoronary vasodilatory agents such as nitroglycerin, nitroprusside, verapamil, adenosine, nitroglycerin, or nicardipine, ideally distally via a microcatheter. (can aid in differentiating microvascular obstruction from a more proximal dissection)
- Correct hypotension with fluids, vasopressors, and pacing as required.
- Consider insertion of intraaortic balloon pump to augment coronary perfusion pressure as last resort.
Management of Guidewire Perforation
https://cardiologyapps.com/complicaid/basics-book/#page/12
Management of Device (Balloon/Stent Expansion) Perforation (from Practical Manual of IC p218)
1. Appropriately sized low pressure balloon inflation just proximal to the perforation site for 10 min. confirm the vessel occlusion with contrast injection through guiding catheter.
2. Stop coagulation. If bivalirudin was used for anticoagulation, stop the infusion and check the ACT If heparin was used, administer protamine sulfate for reversal.
3. Call for assistance. Assistant should start working on the placement of an IABP and pericardiocentesis.
4. If hemodynamics status is compromised, IABP should be placed by one operator while the second operator performs pericardiocentesis. Meanwhile, IV norepinephrine or vasopressin should be administered to support blood pressure.
5. A covered Jomed™ may be inserted via a second Guide catheter (from contralateral femoral access site or from the radial access site if IABP inserted already through the contralateral femoral artery) or the Guide can be upsized over the balloon delivery system if a 7 Fr Guide is required.
6. Obtain a stat transthoracic echocardiogram while the patient is still on the table. Monitor the patient in CCU afterwards.
Management of Acute Closure (from Practical Manual of IC p214)
1. Differentiate from and treat differently to Slow flow/No flow.
2. Use stent delivery system (SDS) balloon or angioplasty balloon and perform Fogarty maneuver. This will dislodge any thrombus present at the site of intervention and help reestablish the flow.
3. Recheck the ACT and administer additional anticoagulation to maintain ACT > 300.
4. Perform balloon angioplasty to seal the dissection flap and reestablish the flow; stabilize hemodynamics with inotropes, atropine, or IC fluid challenges. Insertion of IABP may be required. Arrhythmias should be treated with anti-arrhythmic medications and cardioversion is required.
5. Perform re-stenting if dissection occurs in medium or large-sized vessels (for small-sized vessels additional balloon angioplasty may be necessary).
6. If thrombus is present, use a Twin-Pass Catheter™ (Vascular Solutions) and administer distal vasodilators.
- If above measures are ineffective, obtain multiple angiographic views to rule out air embolism, left main dissection, or distal embolization. Selective injection of contrast through the central balloon lumen or intravascular ultrasound (IVUS) may also be helpful in such cases.
- Air embolism should be managed by increasing BP using vasopressors and repeated flushing to move the air to distal microvasculature.
- Administer IV nitroglycerin if patient’s hemodynamics are stable (to rule out component of spasm).
- After successful reestablishment of antegrade flow, these patients require close intensive cardiac care unit monitoring.
- If none of the approaches are effective, the patient may need coronary artery bypass grading (CABG).
Management of Burr Entrapment¹
- Never attempt to start rotablation if the burr has stalled in the lesion.
- First try pulling back the rotablator system by manual traction.
- Although it is never acceptable for the two to touch during rotation atherectomy, as the burr is on a tapered section of the RotaWire of 0.005”, the 0.014” distal tip may allow the operator to pull the entrapped burr out with the spring coil.
- Dilate balloon proximal to the entrapped burr via the same or second catheter.
- If initial inflation doesn’t free the burr, use deep guide catheter or child-in-mother catheter coronary intubation and subintimal tracking and reentry with balloon dilation adjacent to the entrapped burr.
- Watch the patient / Hemodynamics carefully for secondary complications such as dissection or perforation.
- Cardiac surgery consultation in the case of an unsuccessful retrieval.
Careful and Conservative RA Techniques to prevent Burr Entrapment
- Gentle pecking motion especially in long, heavily calcified and angulated lesions.
- Short runs of rotablation of less than 20s.
- Avoid burr speeds of greater than 160,000 RPM.
Dissection and Perforation Classifications
Coronary Artery Dissection Classifications
Coronary Artery Perforation Classifications
1: Circ Cardiovasc Interv. 2019 May;12(5):e007448. doi: 10.1161/CIRCINTERVENTIONS.118.007448.
2: JACC Cardiovasc Interv. 2014 May;7(5):510-8. doi: 10.1016/j.jcin.2014.01.158.
Dual antiplatelet therapy:
- More potent antiplatelet therapies like Ticagrelor or Prasugrel can be considered in cases of two stent techniques.
- In case of Left Main PCI with 2 stent techniques, can consider dual antiplatelet therapy beyond 1 year.
- Consider calculating DAPT score to determine the long-term usage.
GP IIb / IIIa inhibitors:
- Eptifibatide (Integrillin) commonly used. Abciximab (ReoPro) and Tirofiban (Aggrastat) are other two drugs.
- Can be considered in post-PCI SB compromise.
- Safer in transradial high risk PCI compared to transfemoral approach.
- Brachytherapy, although initially approved for BMS-ISR, is currently almost exclusively used for DES restenosis.
- IVBT aims to deliver a uniform amount of low radiation dose to impede new intimal cell growth at target arterial segment without causing damage to healthy surrounding tissue.
- This is achieved by both direct ionizing emission–induced damage as well as free radical-mediated injury resulting in reducing cell proliferation in the media and adventitia.
- Radiation also exerts positive effects on restenosis with its myriad of anti-inflammatory activities, such as decreasing chemotaxis and inhibition of leucocyte migration, cytokine production, and macrophage activity.
Technique:
- Used commonly in ISR and multilayer stents.
- 6F Guide catheter is used.
- Before IVBT, prepare the lesion with either CB-PTCA for focal ISR, and Atherectomy (RA or Laser) for diffuse ISR in usual manner
- Call for Radiation oncologist on board.
- Single catheter accommodates any source jacketed radiation source train (JSRT) length.
- Choose one of the fixed length JRSTs available for optimal lesion coverage (30mm, 40mm and 60mm) for optimal lesion coverage.
- Advance the IVBT catheter (Novoste Beta-Cath 3.5F system, Best Vascular Inc. Springfield, VA) in mono-rail fashion, over the workhorse wire, covering entire lesion.
- Risk of thrombosis is high with IVBT catheter, so keep ACT > 280.
- Deliver the radioactive material (strontium-90/yttrium-90 isotope) according to the radiation oncology protocol. (dwell time is usually 3-4 minutes)
- Remove the catheter while keeping the wire in place.
- Take a low magnification angiogram to rule out dissection
- DAPT for 3 years is recommended after IVBT
Equipment:

